Google Search Console integration - Setup
Google Search Console is a free tool from Google that helps you check how your website appears in Google search results.
When integrated with ShinyStat, data from Google Search Console become a part of your analytic reports and can be combined with other metrics. This way, you can know better how visitors who came through the Google search engine behave on your site.
To integrate Google Search Console reports into your ShinyStat account, follow the procedure below.
Before starting
Here are some things to know before you begin setting up the integration:
- For integration, you will need to access the Google Search Console and Google API Console. If you don’t use these tools, you might need help from your webmaster.
- Data from Google Search Console is not personal data or personally identifiable data, so it can’t be combined with individual visitors tracked by ShinyStat. You can use this data safely as it complies with applicable data protection laws.
Add a website property to Google Search Console
To start off, you need to add a website property to your Google Search Console. If you don’t have a Google Search Console account yet, you’ll need to create it first and then add a property.
To add a new website property to Google Search Console, follow these steps:
- Log in to Google Search Console.
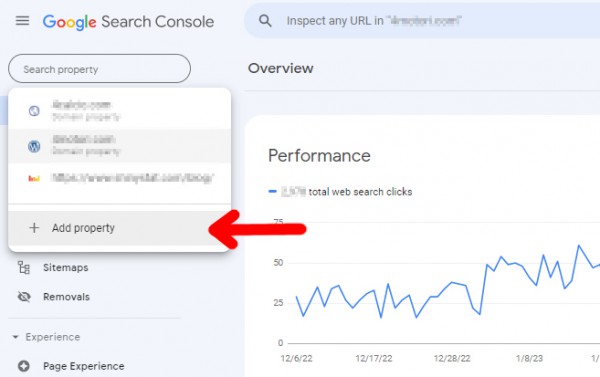
- Open the drop-down property select and click + Add property.
- Choose the type of property to add: domain or URL prefix.
For more information on property types, read the Google article "Add a website property".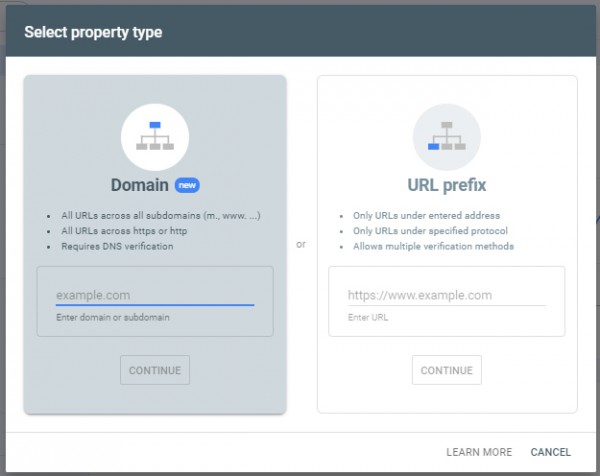
- Verify your website property.
- Google starts collecting data as soon as you add the property, even before verification. But the data will appear in Google Search Console in a few days.
Enable Google Search Console API
Once you have your website property in Google Search Console, you can move to the next step: enabling an API. ShinyStat needs an access to an API to connect with Google Search Console and retrive the data.
To enable Google Search Console API, follow these steps:
- Log in to Google API console on Google Cloud.
- From the projects list, select an existing project or create a new one.
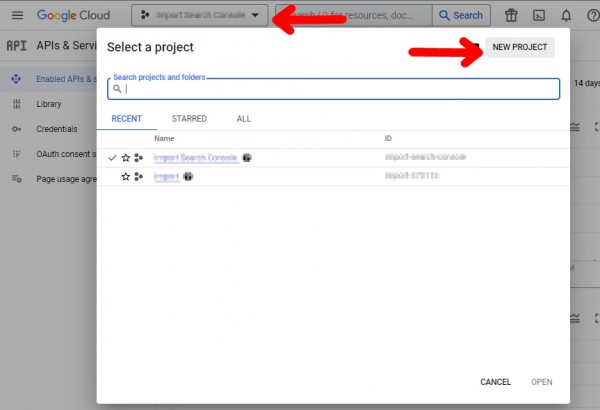
- Once selected or create a project, click on Library on the left menu.
- Use the search field to find "Google Search Console API" and select it.
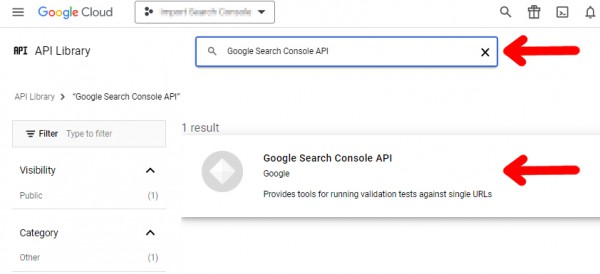
- Click on "Enable"
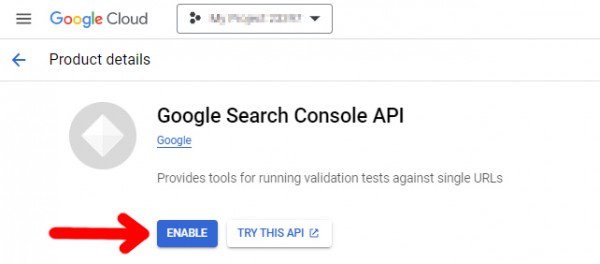
Set up the OAuth 2.0 client in Google API Console
Now that you have your API ready, you need create an oAuth 2.0 client. The oAuth 2.0 is a protocol that will grant ShinyStat access to the information from Google Search Console.
To set up an oAuth 2.0 client for Google Search Console API, follow these steps:
- Log in to Google API console on Google Cloud.
- From the list of projects, select the project that you have enabled the Google Search Console APIs.
- In the left menu, click "OAuth Consent Screen" to create a new consent screen.
- In User type choose "External", than click on Create button.
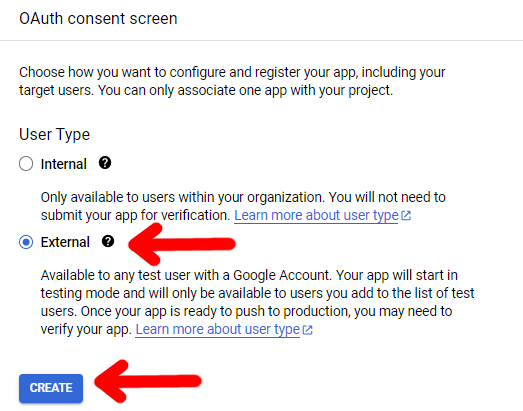
- Add the following information that will appear later on the consent screen:
- App name: ShinyStat Analytics
- User support email: la tua email
- Logo file tu upload: it is recommended to leave blank. If a logo is inserted, the consent screen must be verified by Google and the process can last several days.
- Application home page: https://www.shinystat.com
- Application privacy policy link: https://www.shinystat.com/en/informativa_privacy_generale.html
- Application terms of service link:
- Authorized domain: shinystat.com
- Developer contact information: support@shinystat.com
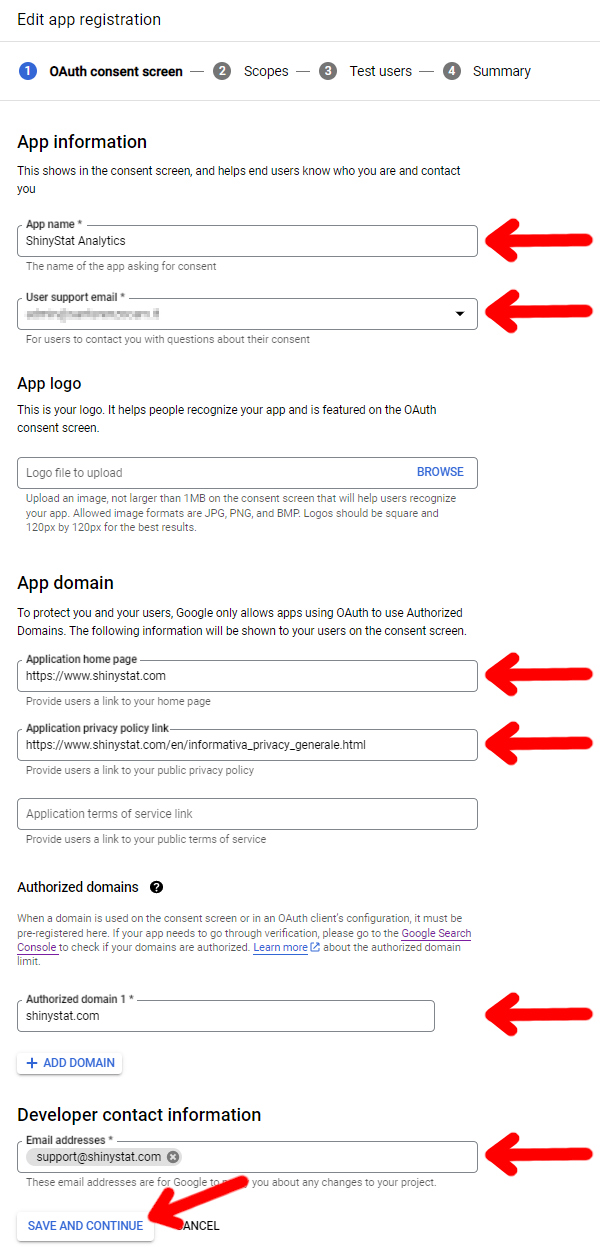
- Click Save and continue
- Click Add or remove scopes button.
- Select
../auth/webmasters.readonly
from the list or manually add scopeshttps://www.googleapis.com/auth/webmasters.readonly
then click on Update to add the selected scope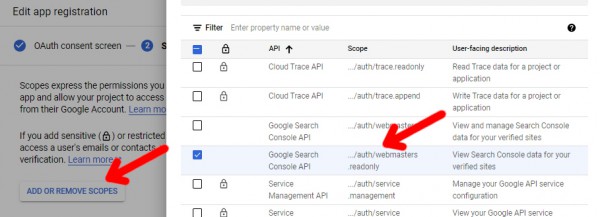
- Now the scope is added
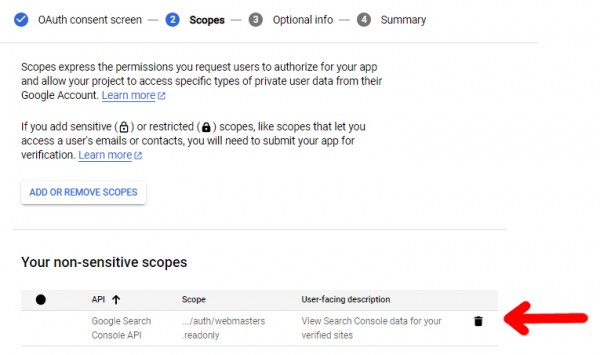
- Click on Save and continue. You don't need to set up any other items, just follow the next steps and click Back to Dashboard on the last Summary page
- Click Publish app. If the app isn’t published, the authentication token expires after 7 days and ShinyStat integration with Google Search Console will turns off.
- Click on "Confirm".
- Now the OAuth consent screen is public. Since it’s using a non-sensitive scope, it doesn’t require verification from Google.
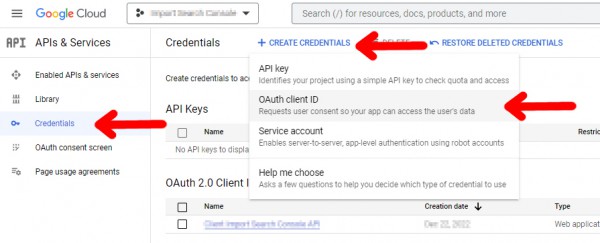
- On the left, click Credentials.
- Click on + CREATE CREDENTIALS, then select "OAuth client ID".
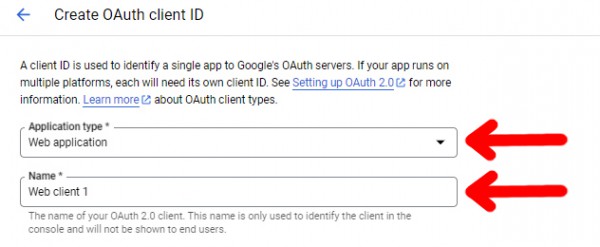
- As "Application type" select "Web application" and as "Name" you can leave the one suggested by Google
- Add the following URI in the "Authorized redirect URIs" section:
https://report.shinystat.com/settings/search-console/oauth2callback
and click on Create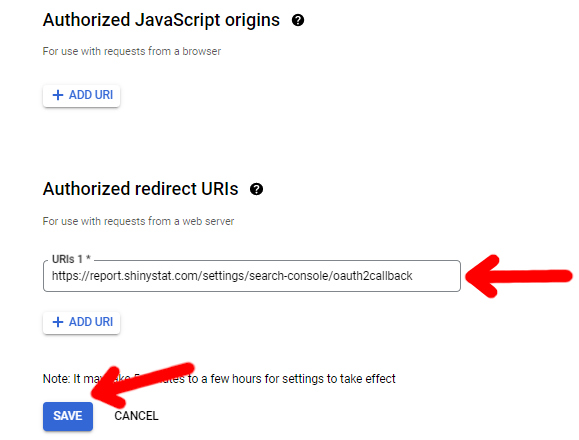
- Once the oAuth client ID is ready, click the download icon to get the JSON file which we’ll need in the ShinyStat account Settings.

- Click on Download JSON to save the JSON file on your PC.
Connect your ShinyStat account with a website property in Google Search Console
Now, as you have the oAuth 2.0 client for Google Search Console API ready, you can continue setting up the integration into your ShinyStat account Settings:
- Log in on your ShinyStat account
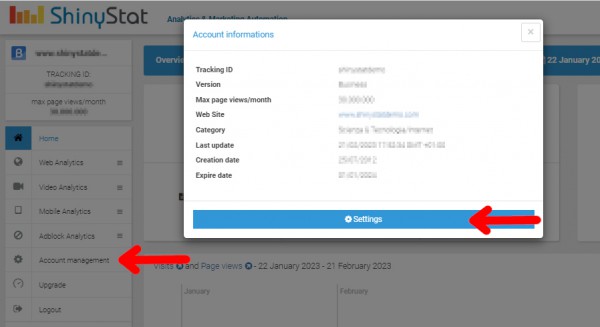
- Click on Account management on the left, then on Settings
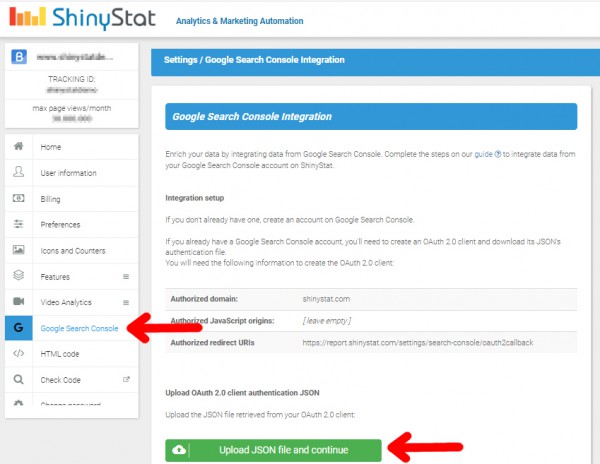
- Click on Google Search Console on the left menu
- Upload the previously downloaded OAuth 2.0 client authentication JSON file by clicking on the "Upload JSON file and continue" button
- Follow confirmation screens from Google and click Allow.
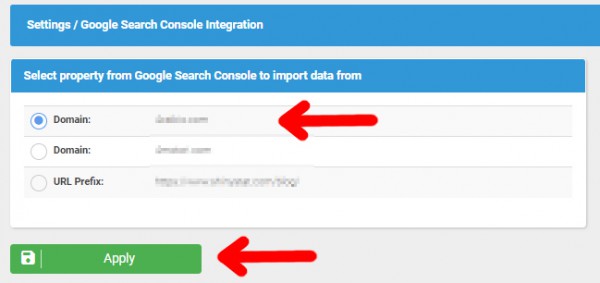
- If you have more than one website property in Google Search Console, choose the property that you want to connect with your ShinyStat account. Be mindful to choose the right property, otherwise, your data will be inaccurate.
- Click on Apply
Now you're done. The integration is ready and within 24 hours ShinyStat will download data from Google Search Console up to the last 16 months. Then ShinyStat will update the data once a day. Just keep in mind that Google Search Console provides data with a 3 day delay, so the data you see in the reports will not be updated to the current day.
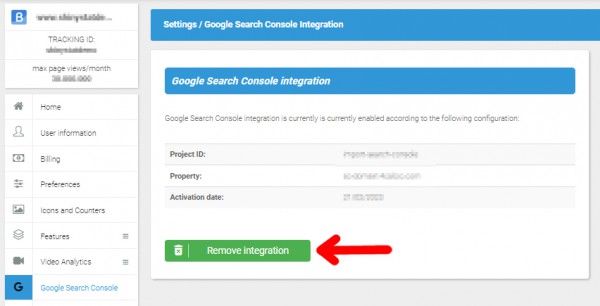
To suspend the integration with Google Search Console once activated, click on the Remove integration button:
The new reports will be visible in the new "Google Search Console" section under "Web Analytics" which will appear once the integration procedure is complete.
